Vegan Butternut Squash Aloo Gobi

Vegan butternut squash aloo gobi

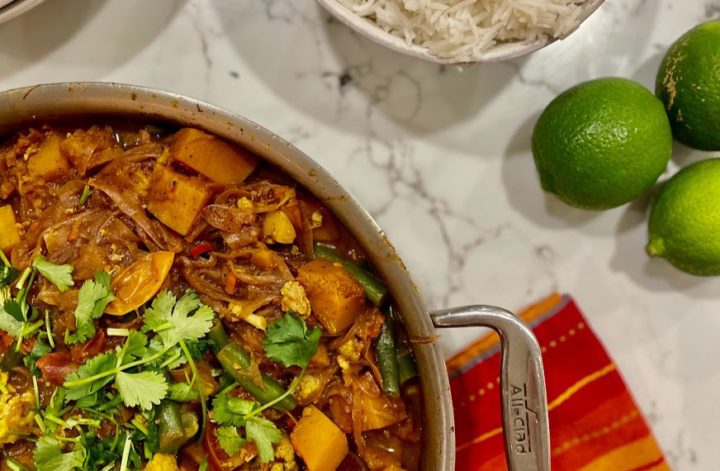
This dish is a perfect combination of cauliflower, known as gobi, which is cooked with sweet butternut squash instead of the classic potatoes (the aloo). This dish is not only vegan, but it’s also gluten-free and can be made in under an hour. So, whether you’re a vegan looking for a new recipe to try or just looking for a healthy and tasty dish to add to your meal rotation, this recipe is a great way to get a ton of veggies in an incredibly flavorful and warming way!

Vegan Butternut Squash Aloo Gobi

A delicious and healthy vegan version of the classic Indian dish, Aloo Gobi.
Prep Time30 minutes
Cook Time40 minutes
Course: Main Course
Cuisine: Indian, vegan
Keyword: dinner, indian, spicy, vegan
Servings: 4

Ingredients

  • 2 tbsp olive oil
  • 2 large red onions thinly sliced, ideally on a mandolin if you have one
  • 1 butternut squash cubed in appx 1" cubes
  • 1 cauliflower head broken up into florets roughly the same size as the butternut squash pieces or a bit larger
  • 1 cup green beans trimmed and cut in half
  • 2 cups cherry tomatos sliced in half
  • 6 cloves garlic
  • 1 inch root ginger
  • 1 green chili de-seed, or just use half for a less spicy dish
  • 4 tbls garam masala
  • 2 tsp ground turmeric
  • 2 tsp cumin
  • 2 tsp salt
  • 2 cups vegetable stock
  • 1 lime
  • 1 bunch cilantro (also known as fresh corriander) optional, for serving

Instructions

  • Prepare all of your vegetables, keeping them in separate bowls for now. Peel and thinly slice the red onions, ideally on a mandolin grater. Peel and cube the butternut squash. Separate the cauliflower into florets. Trim and halve the green beans. And finally slice the cherry tomatoes in half.
  • Prepare your aromatics. These can all go into the same bowl. Peel and grate the ginger root on a microplane grater. Then add pressed garlic cloves. Add the finely chopped the green chili, then add the garam masala, turmeric, cumin, and salt.
  • Place a very large stainless steel frying pan for which you have a lid over medium heat and add the olive oil, then the onions. If you don't have a pan big enough, you can also do this in a large saucepan. Cook until the onions are completely soft and just starting to brown a little, 7-10 minutes. If your onions start to really stick or burn, turn down the heat or add a tablespoon or two of water to the pan.
  • Add the aromatics (ginger, garlic, and spices) to the onions and stir to evenly coat and just begin to cook the garlic and ginger, 2-3 minutes. Then add the vegetable stock, taking a moment to scrape up any fond on the bottom of the pan. Then add the squash, tomatoes, and cauliflower, cover, and let cook for 15-20 minutes or until the squash is starting to feel quite soft when poked with a fork or paring knife.
  • After 15-20 minutes, add the green beans, stir, cover again and cook for 5 more minutes. At this point the squash should be quite soft and cooked through. Feel free to give it more time if not.
  • Once the squash is fully cooked, remove from the heat, and add the zest of the lime, followed by the lime's juice. Stir to mix in the lime zest and juice.
  • Serve over basmati rice and topped with the cilantro, if using. This dish keeps well in the fridge for up to 4 days.
Continue Reading

Irresistible Vegan Chocolate Cream Pie

Irresistible Vegan Chocolate Cream Pie

Irresistible Vegan Chocolate Cream Pie

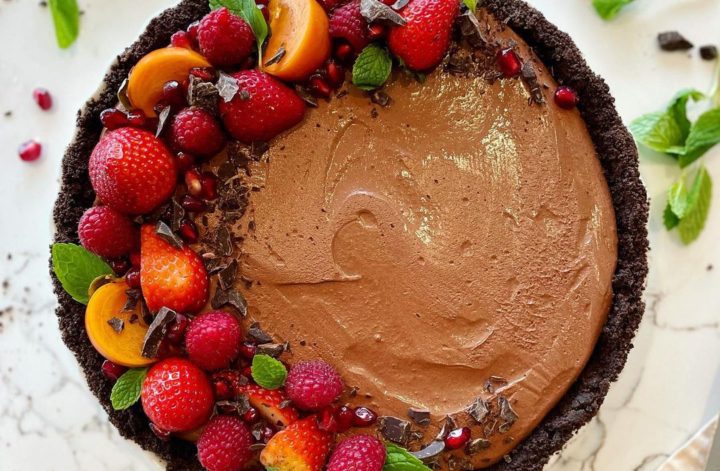
This over-the-top decadent chocolate pie is has a silky smooth rich chocolate filling somewhere between a pudding and a ganache. Don't be fooled by the secret ingredient of silken tofu – it's for texture and doesn't appear in the flavor of the pie at all. This show-stopper can be topped with coconut cream, any seasonal fruits, or chocolate shavings depending on your preference. Just don't expect it to stick around too long as it will be a hit with vegans and non-vegans alike!
Prep Time15 minutes
Cook Time10 minutes
Chilling Time4 hours
Course: Dessert
Cuisine: American, vegan
Keyword: chocolate, dessert, pies

Ingredients

Pie Crust

  • 1 package vegan chocolate sandwich cookies such as Oreo or Newman's Own
  • 2 tbls plant-based butter, melted

Pie Filling

  • 1 package silken tofu Appx 14 oz
  • 1/2 cup plant-based milk
  • 1/2 cup almond butter
  • 1 tsp vanilla extract
  • 1 tbls maple syrup
  • 12 oz vegan semi-sweet chocolate chips, melted
  • Fruit, coconut cream, or chocolate shavings to decorate berries like strawberries, raspberries, or blackberries work especially well on this pie

Instructions

  • Preheat the oven to 375 degrees F and prepare a 10" glass pie dish or spring-form baking pan by spraying it with a non-stick cooking spray.
  • In a food processor, pulse the chocolate sandwich cookies until they are fully crushed. Then with the food processor running, slowly pour in the melted butter and process until the mixture resembles a wet sand.
  • Pour the cookie crumbs into the pie dish and use your fingers or the bottom of a glass to press them down and into the sides, so you have an even coating all along the bottom and sides. You will likely have extra cookie crumbs – feel free to save them to top the pie or another dessert later.
  • Bake the pie crust for 7-8 minutes or until the crust is firm. Remove from the oven and let cool completely.
  • While the pie crust is cooling, put all of the pie filling ingredients except the chocolate chips into a blender, and blend until completely combined. Then, ideally with the blender running, pour in the melted chocolate. (A note on melting chocolate – I place the chocolate chips in the microwave in a glass bowl for 30 seconds at a time, removing and stirring well every 30 seconds. Once about 80-90% of the chocolate chips are melted, I simply stir the melty mix until the rest of the chocolate chips melt without any more microwave time. This ensures the chocolate doesn't burn.)
  • Pour the pie filling into the prepared pie crust and use a spatula to smooth. Cover with plastic wrap and place in the fridge to chill for at least 4 hours or preferably overnight.
  • After the pie has chilled, and is firm to the touch, you can decorate it with your fruit, coconut cream, chocolate, or other toppings. It will keep in the refrigerator for 4-5 days, if you can make it last that long!
Continue Reading

Vegan “Cheater” 15 Minute Tofu Banh Mi Sandwiches

Vegan “Cheater” 15 Minute Banh Mi Sandwiches

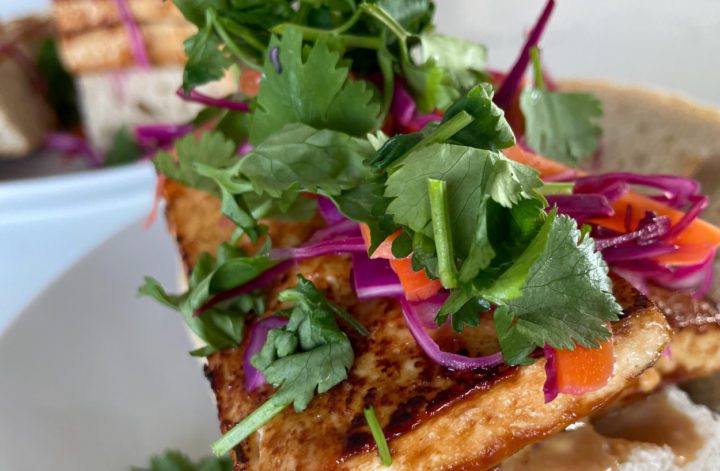
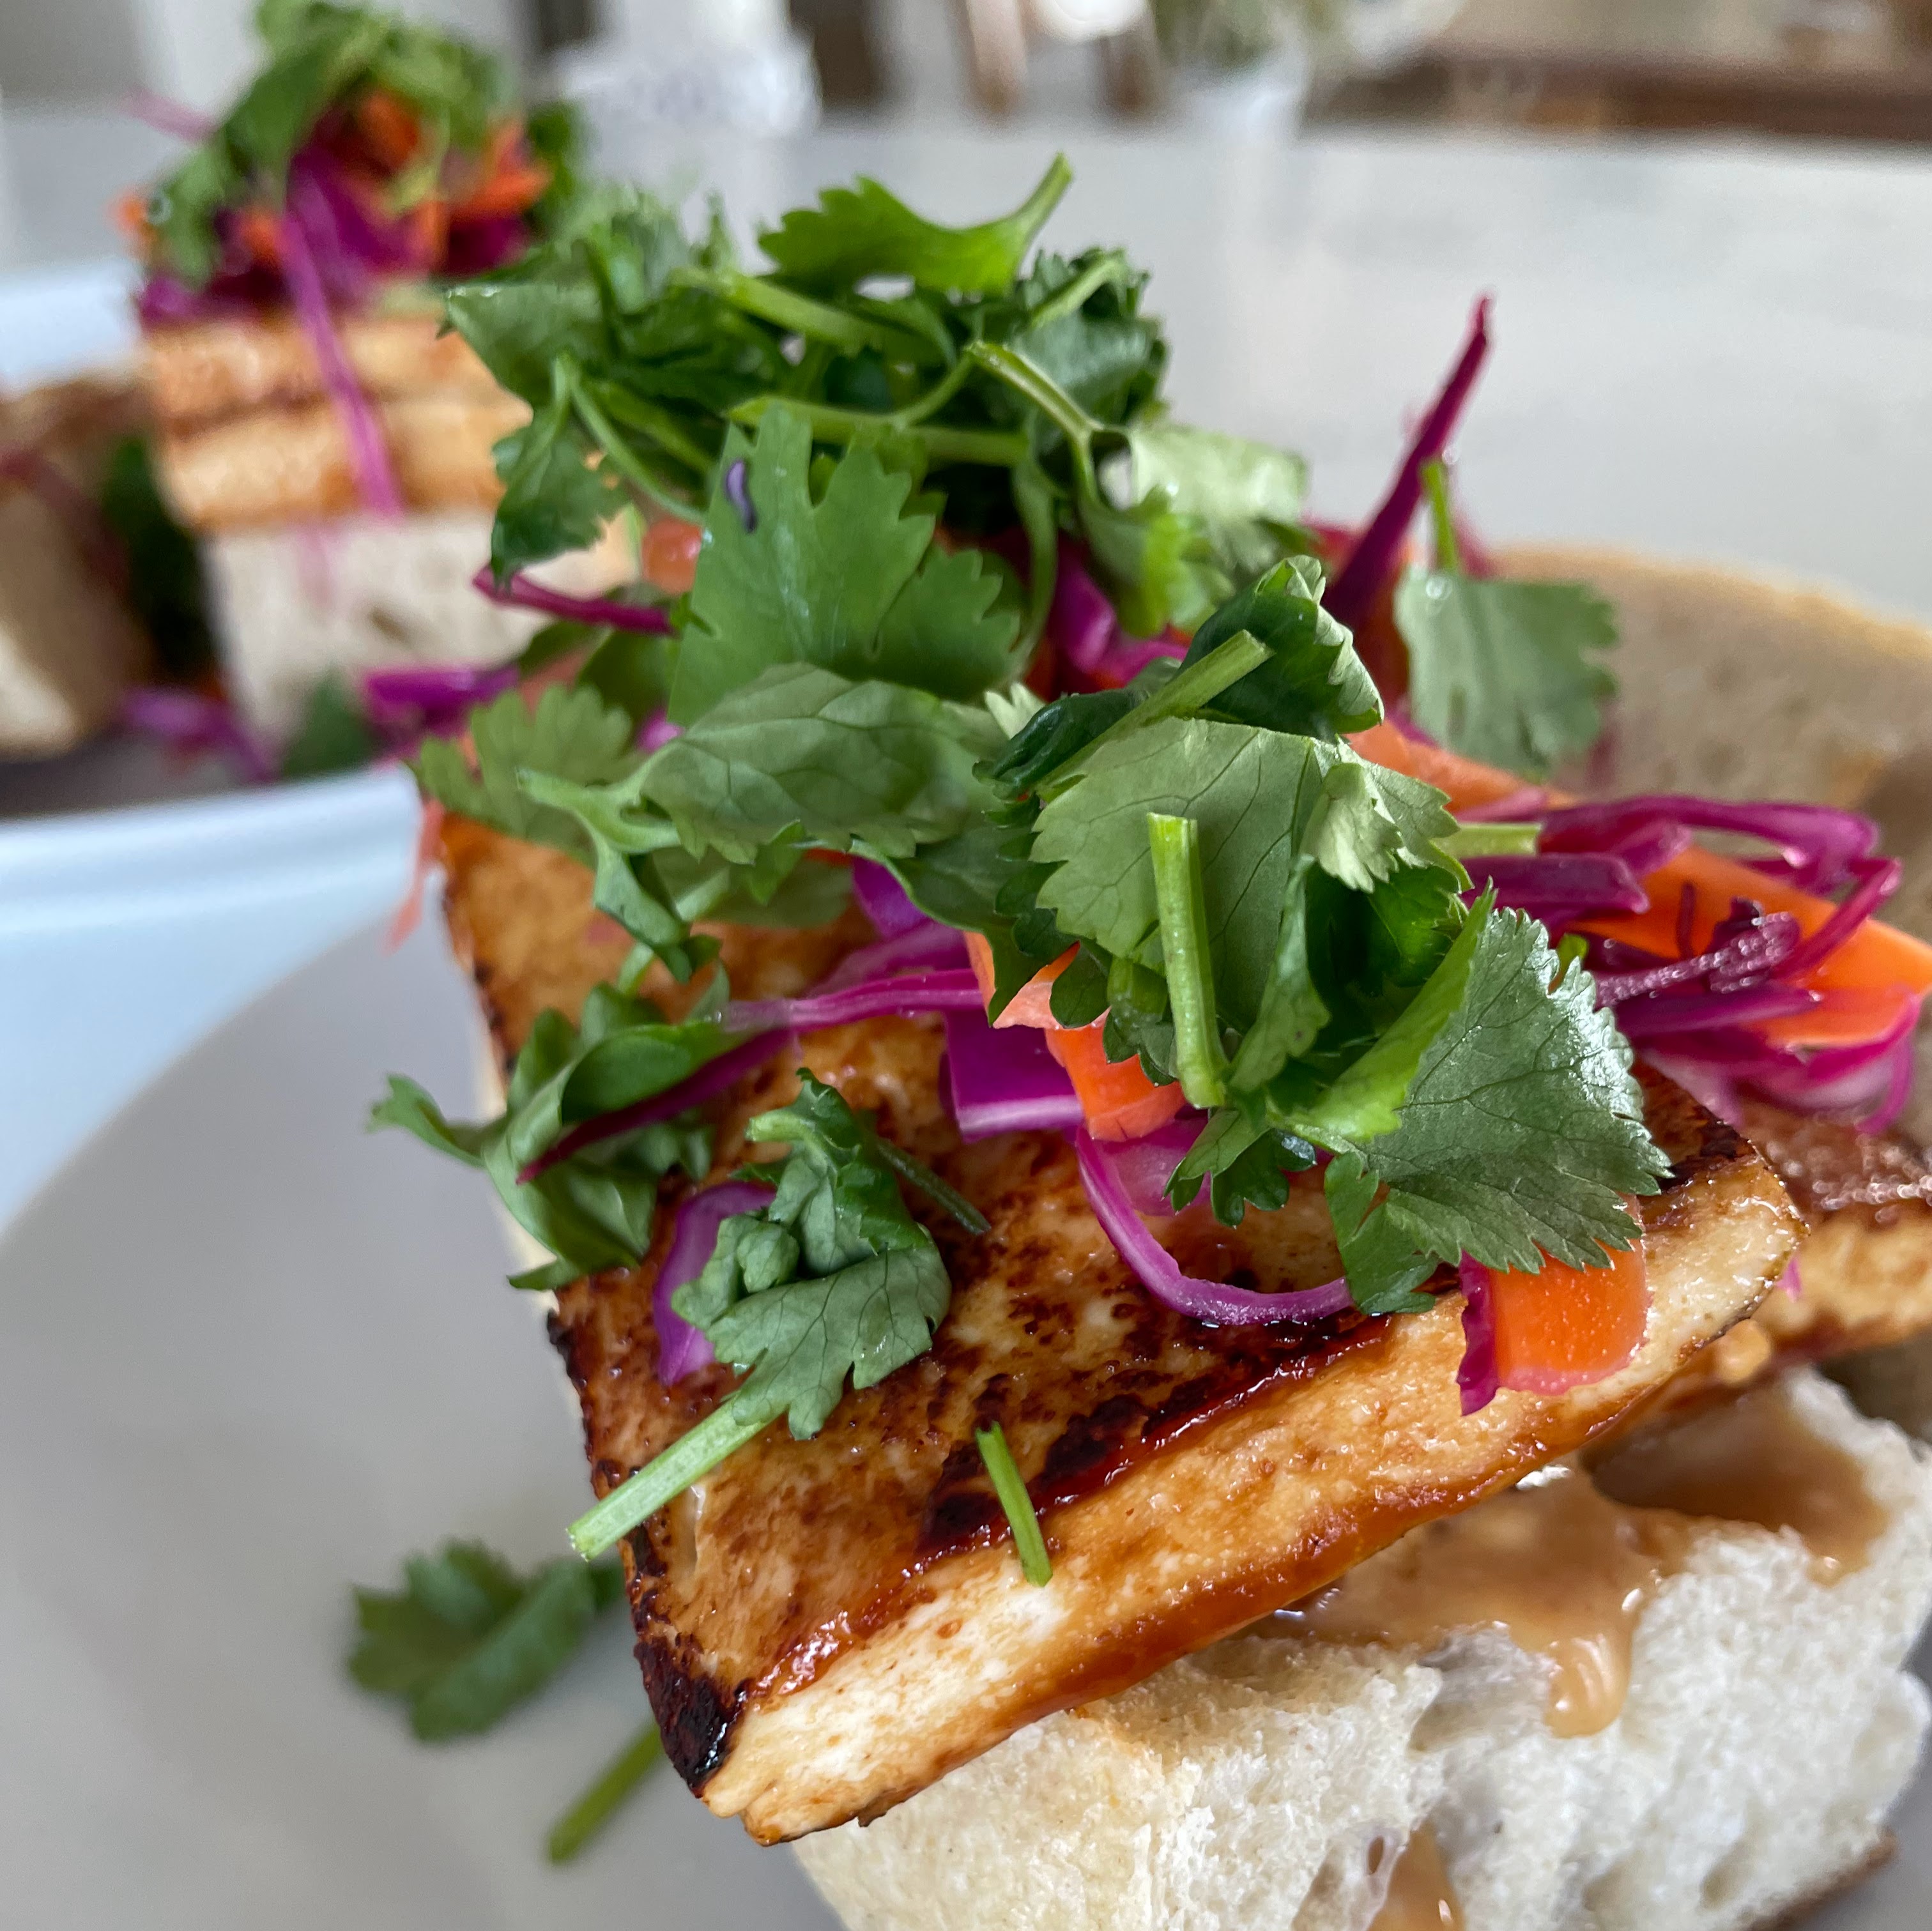
When you're craving a delicious vegan Vietnamese banh mi-style sandwich but are short on time, this "cheater" version of a tofu banh mi is ready in less than 15 minutes and still delicious! Note the instructions for how to avoid any measurements to speed up the process even more.
Prep Time15 minutes
Course: Main Course
Cuisine: vegan, Vietnamese
Keyword: lunch, sandwiches, vegan, vietnamese
Servings: 2 sandwiches

Ingredients

  • 1/2 block extra firm tofu
  • 1/4 cup shredded carrots
  • 1/4 cup shredded cabbage
  • 1/3 cup rice vinegar or can substitute white vinegar
  • 1 tbls sugar
  • 1 tbls hoisin sauce
  • 1 tbls soy sauce
  • 1 tbls agave
  • 1 tsp lime juice
  • 1/8 cup vegan mayonnaise
  • cilantro
  • 1 jalapeno, thinly sliced optional
  • 1 French baguette cut in half to make two sandwiches

Instructions

  • While I've provided exact measurements for this recipe, what makes this so quick and easy is that you really don't need to measure anything exactly. If you want to breeze through this from prep to plate as quickly as possible, feel free to note below where I say, 'For measurement-free prep."
  • Combine the shredded carrot and cabbage in a small bowl with the rice vinegar and sugar, toss it together with your hands, and set aside. For measurement-free prep, put your shredded veggies in a bowl and pour the rice vinegar over until just barely covering the veggies, then add a scant spoonful of sugar and toss to combine.
  • Combine the hoisin sauce, soy sauce, agave, and lime juice and whisk to combine. For measurement-free prep, note that the hoisin, soy sauce, and agave are a 1:1:1 ratio so just fill a large spoon with each sauce to add equal proportions of each, then add a splash of lime juice.
  • Slice the tofu block and place on a non-stick fry pan over medium heat. Brush or use a spoon to lightly coat the tofu with the sauce. Flip the tofu slices every minute or so, coating with more sauce each time you flip it. You'll want the tofu to be well-seared, about 6-8 minutes.
  • Once you've coated the tofu a few times, add the mayonnaise to the remaining sauce and stir to combine. If it's completely liquid, add a bit more mayo (this will be spread directly on the bread so it can be runny but you don't want it to just run off).
  • Remove the tofu from the heat and assemble the sandwich. Spread a generous amount of the mayo-sauce mixture on the bread, then place the tofu slices, then some of the quick-pickled shredded veg, squeezing out any excess vinegar. Finally top with chopped cilantro and jalapeno if using. Serve immediately.
Continue Reading

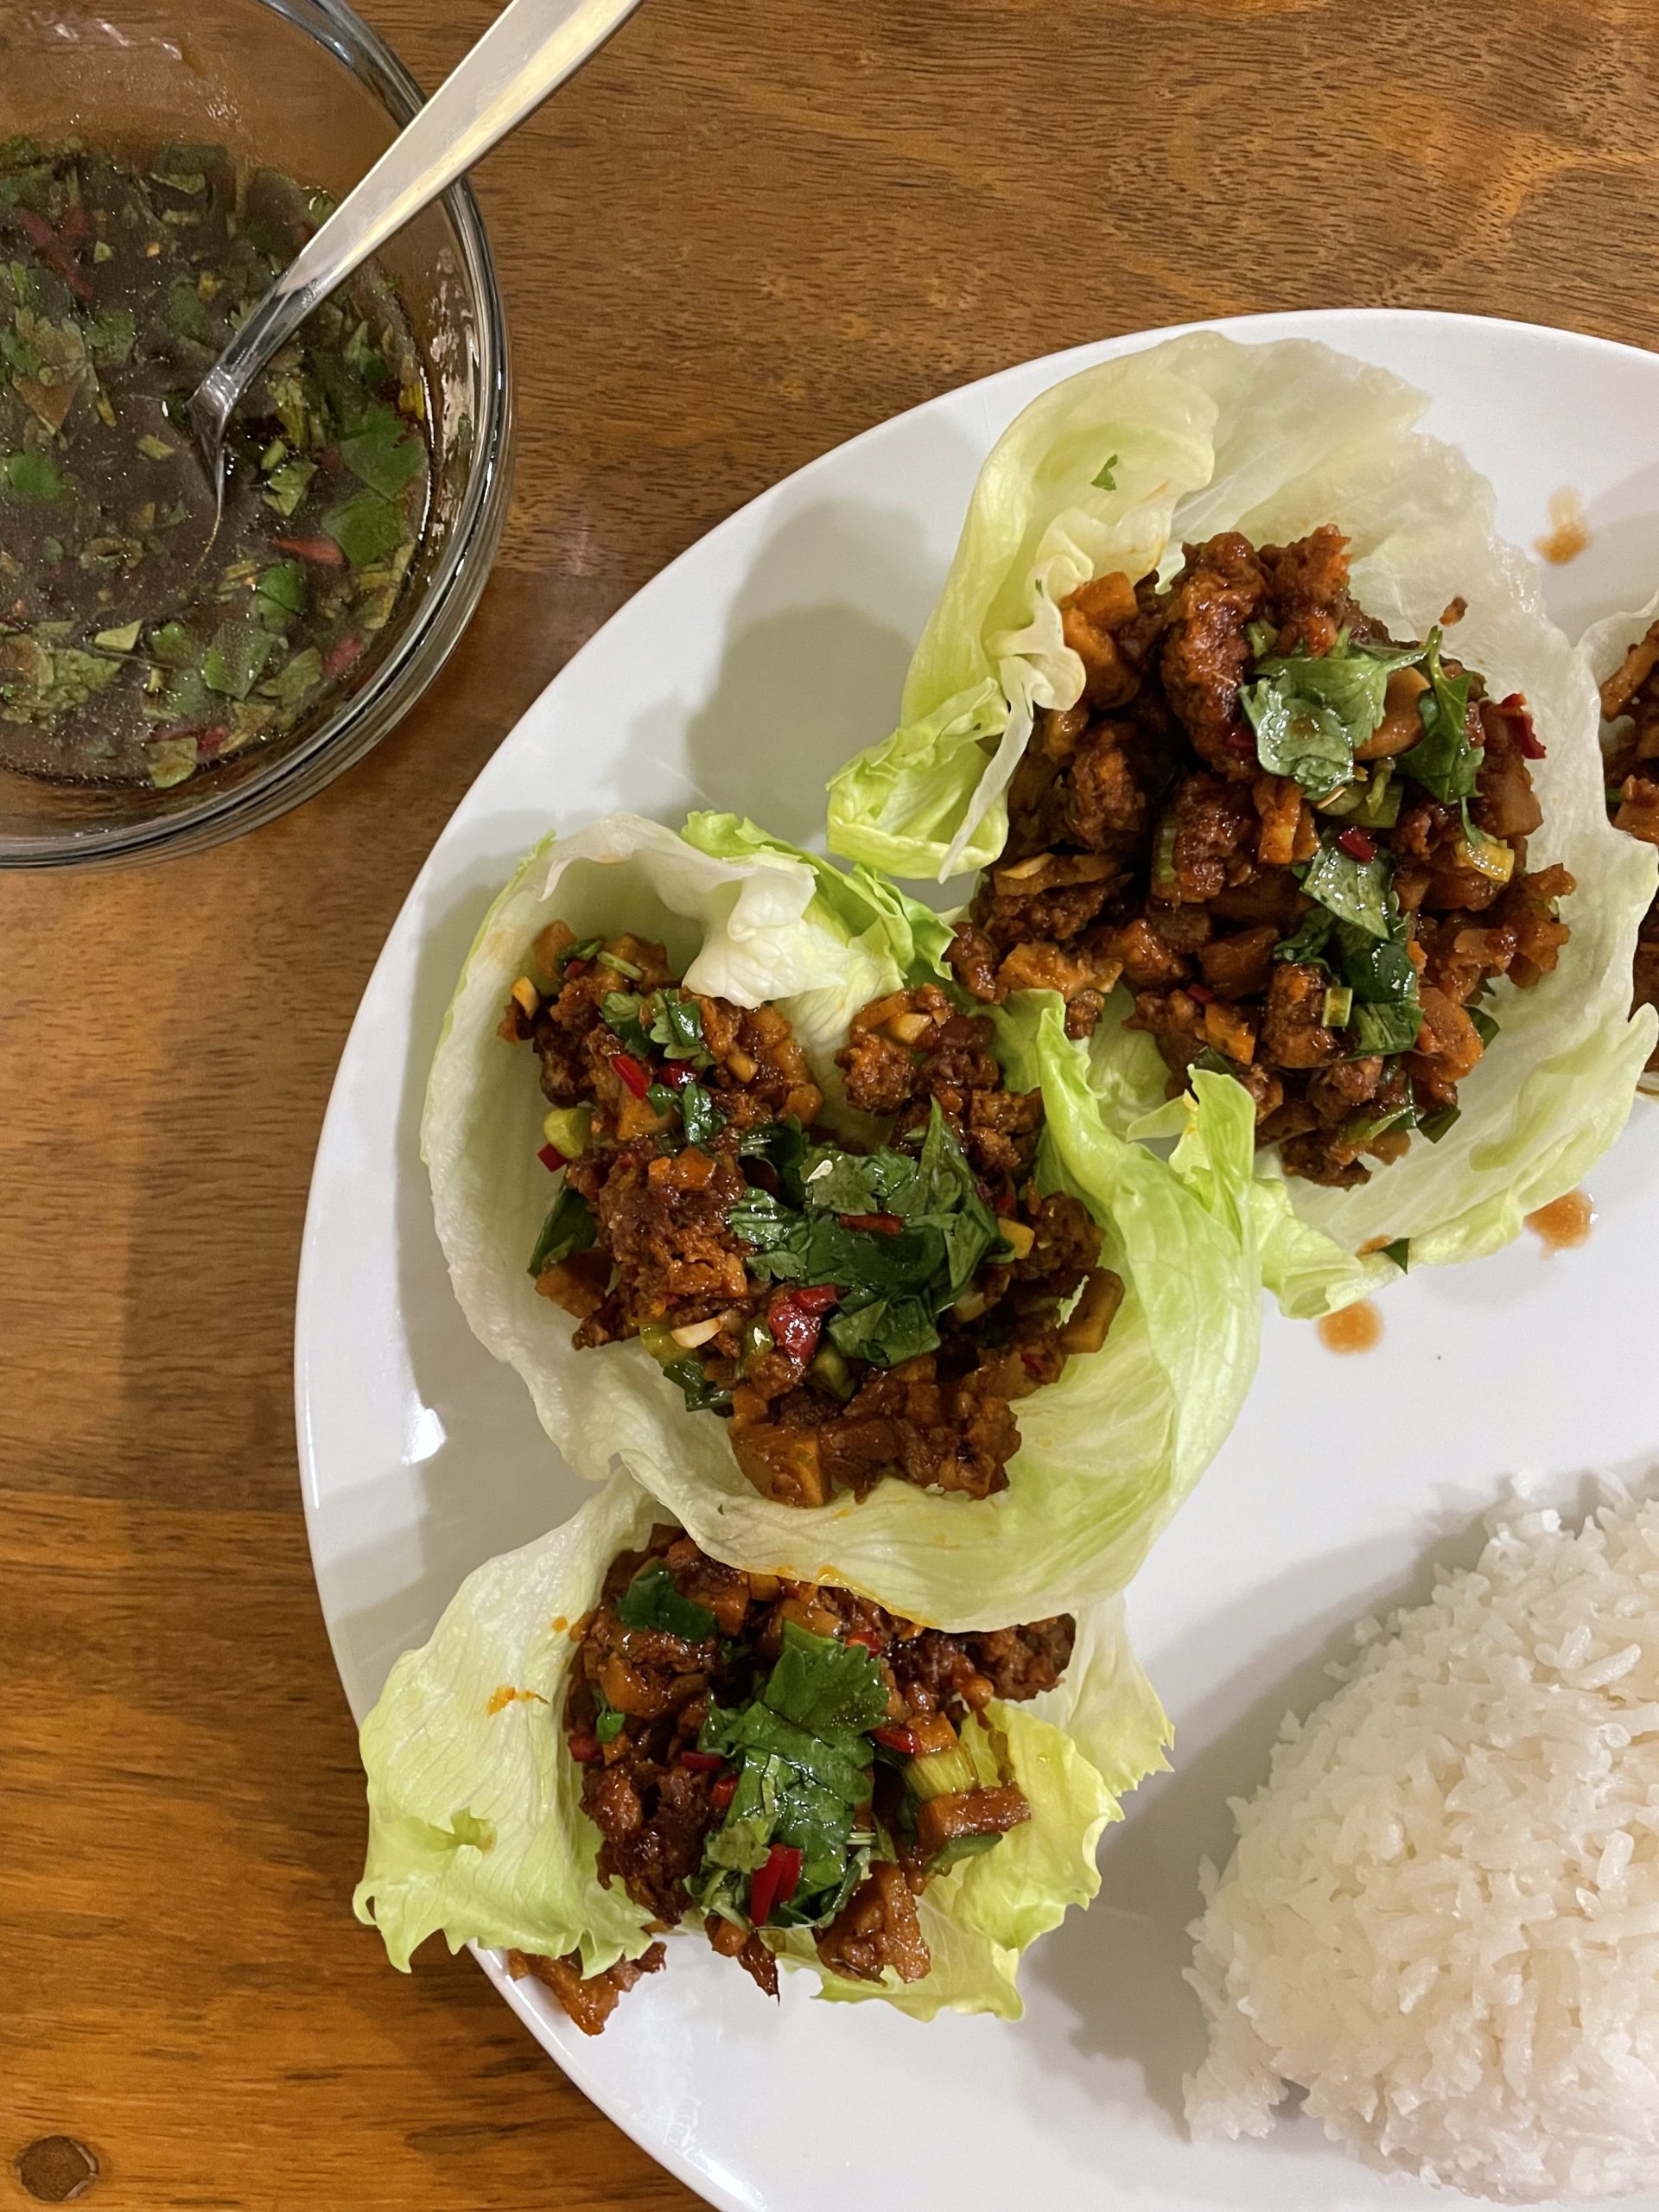
The Vegan Version of Gordon Ramsey’s Chili Beef Lettuce Wraps

Vegan Chili Lettuce Wraps

Inspired by a request to recreate a vegan version of this Chili Beef Lettuce Wrap recipe by Gordon Ramsey, this vegan variation is surprisingly meaty, salty, spicy, and sweet and definitely hits the spot if you're looking for a satisfying replacement for the Gordon Ramsey classic!
Prep Time30 minutes
Course: Appetizer, Main Course
Cuisine: American, Chinese, vegan
Keyword: vegan
Servings: 2

Ingredients

Chili Lettuce Wraps

  • 2 tbls vegetable oil for frying
  • 2 links firm vegan sausage such as Field Roast any brand is fine but it should be firm when uncooked. I recommend the garlic and fennel or garlic and sage versions but really any flavor will work here. If you can't find a firm vegan sausage, you can replace this with 200g minced mushrooms although it won't be nearly as 'meaty'.
  • 2 links vegan chorizo-style sausage (200g) fortunately there a number of brands available these days. You should look for one that's quite soft, and will crumble when removed from the casing. Unfortunately for the flavors you're going for, this one is a bit harder to replace but you could use 200g ground walnuts and a chorizo spice blend if you truly can't find any store bought options.
  • 4 cloves garlic minced
  • 1 tbls fresh ginger grated on a microplane or minced very fine
  • 2 tsp toasted sesame oil
  • 1-2 red chilis very finely chopped. Remove the seeds if you're concerned about heat
  • 1 tbls brown sugar
  • 1 tbls vegan oyster sauce this can be replaced with soy sauce if you can't find vegan oyster sauce
  • 4 scallions sliced thinly
  • 2 heads gem or romaine lettuce for the lettuce cup holders

Dressing

  • 1 tbls soy sauce
  • 1/2 lime you'll have enough left over from the lime reference above, but if you want a really lime-y sauce you might want a second one on hand to taste
  • 1/2 red chili finely sliced
  • 1/4 cup cilantro leaves (10g roughly, also called corriander leaves)
  • 1 tsp vegan oyster sauce this can be replaced with more soy sauce if you can't find vegan oyster sauce
  • 1 tsp brown sugar
  • 1 tbls olive oil

Instructions

Make the Chili Sausage Mixture

  • First, chop the firm vegan sausage into very tiny pieces, about half the size of your pinky nail. Place in a bowl, then take the vegan chorizo and remove the casing, and break it up fully with your fingers into the bowl as well. Use your hands to toss the two types of sausage together.
  • Heat a large frying pan with the 2 tbls oil, then add the vegan sausage to start cooking. Fry the mince in the hot pan until it starts to brown, stirring regularly so it browns evenly. This will take about 4-6 minutes.
  • Once the vegan sausage has browned, add the garlic, ginger, and red chilis, and stir it into the sausage. Let it cook for 1-2 minutes until aromatic.
  • While the mince is cooking, in a small bowl, combine the toasted sesame oil, sugar, vegan oyster sauce, zest of the lime and the juice from one half of it, and whisk them together.
  • Pour the contents of the bowl over the vegan sausage and aromatics, using a spatula to make sure you get it all out. Stir the contents of the fry pan together and reduce to a very low heat to let the vegan sausage finish cooking and the sauce to warm up and thicken.
  • Finally, add the chopped scallions and stir the mixture. Leave it over very low heat while preparing the dressing and lettuce cups.

Make the Dressing

  • Combine all dressing ingredients together and adjust for taste. If you feel it is too salty, you can add more lime juice to balance it out.

Prepare the Lettuce Cups

  • Chop off the bottom of your lettuce head, and carefully pull off the leaves so they can be used as cups for the mince.
  • Add a few spoonfuls of the mince mixture to each lettuce cup. Serve with the dressing on the side to either to spoon over the lettuce cups.

Notes

If you’re having trouble getting neat ‘cups’ from your lettuce leaves, you can simply serve the mince over a bed of chopped lettuce. It’s also a great dish served this way with some jasmine rice on the side!

Continue Reading

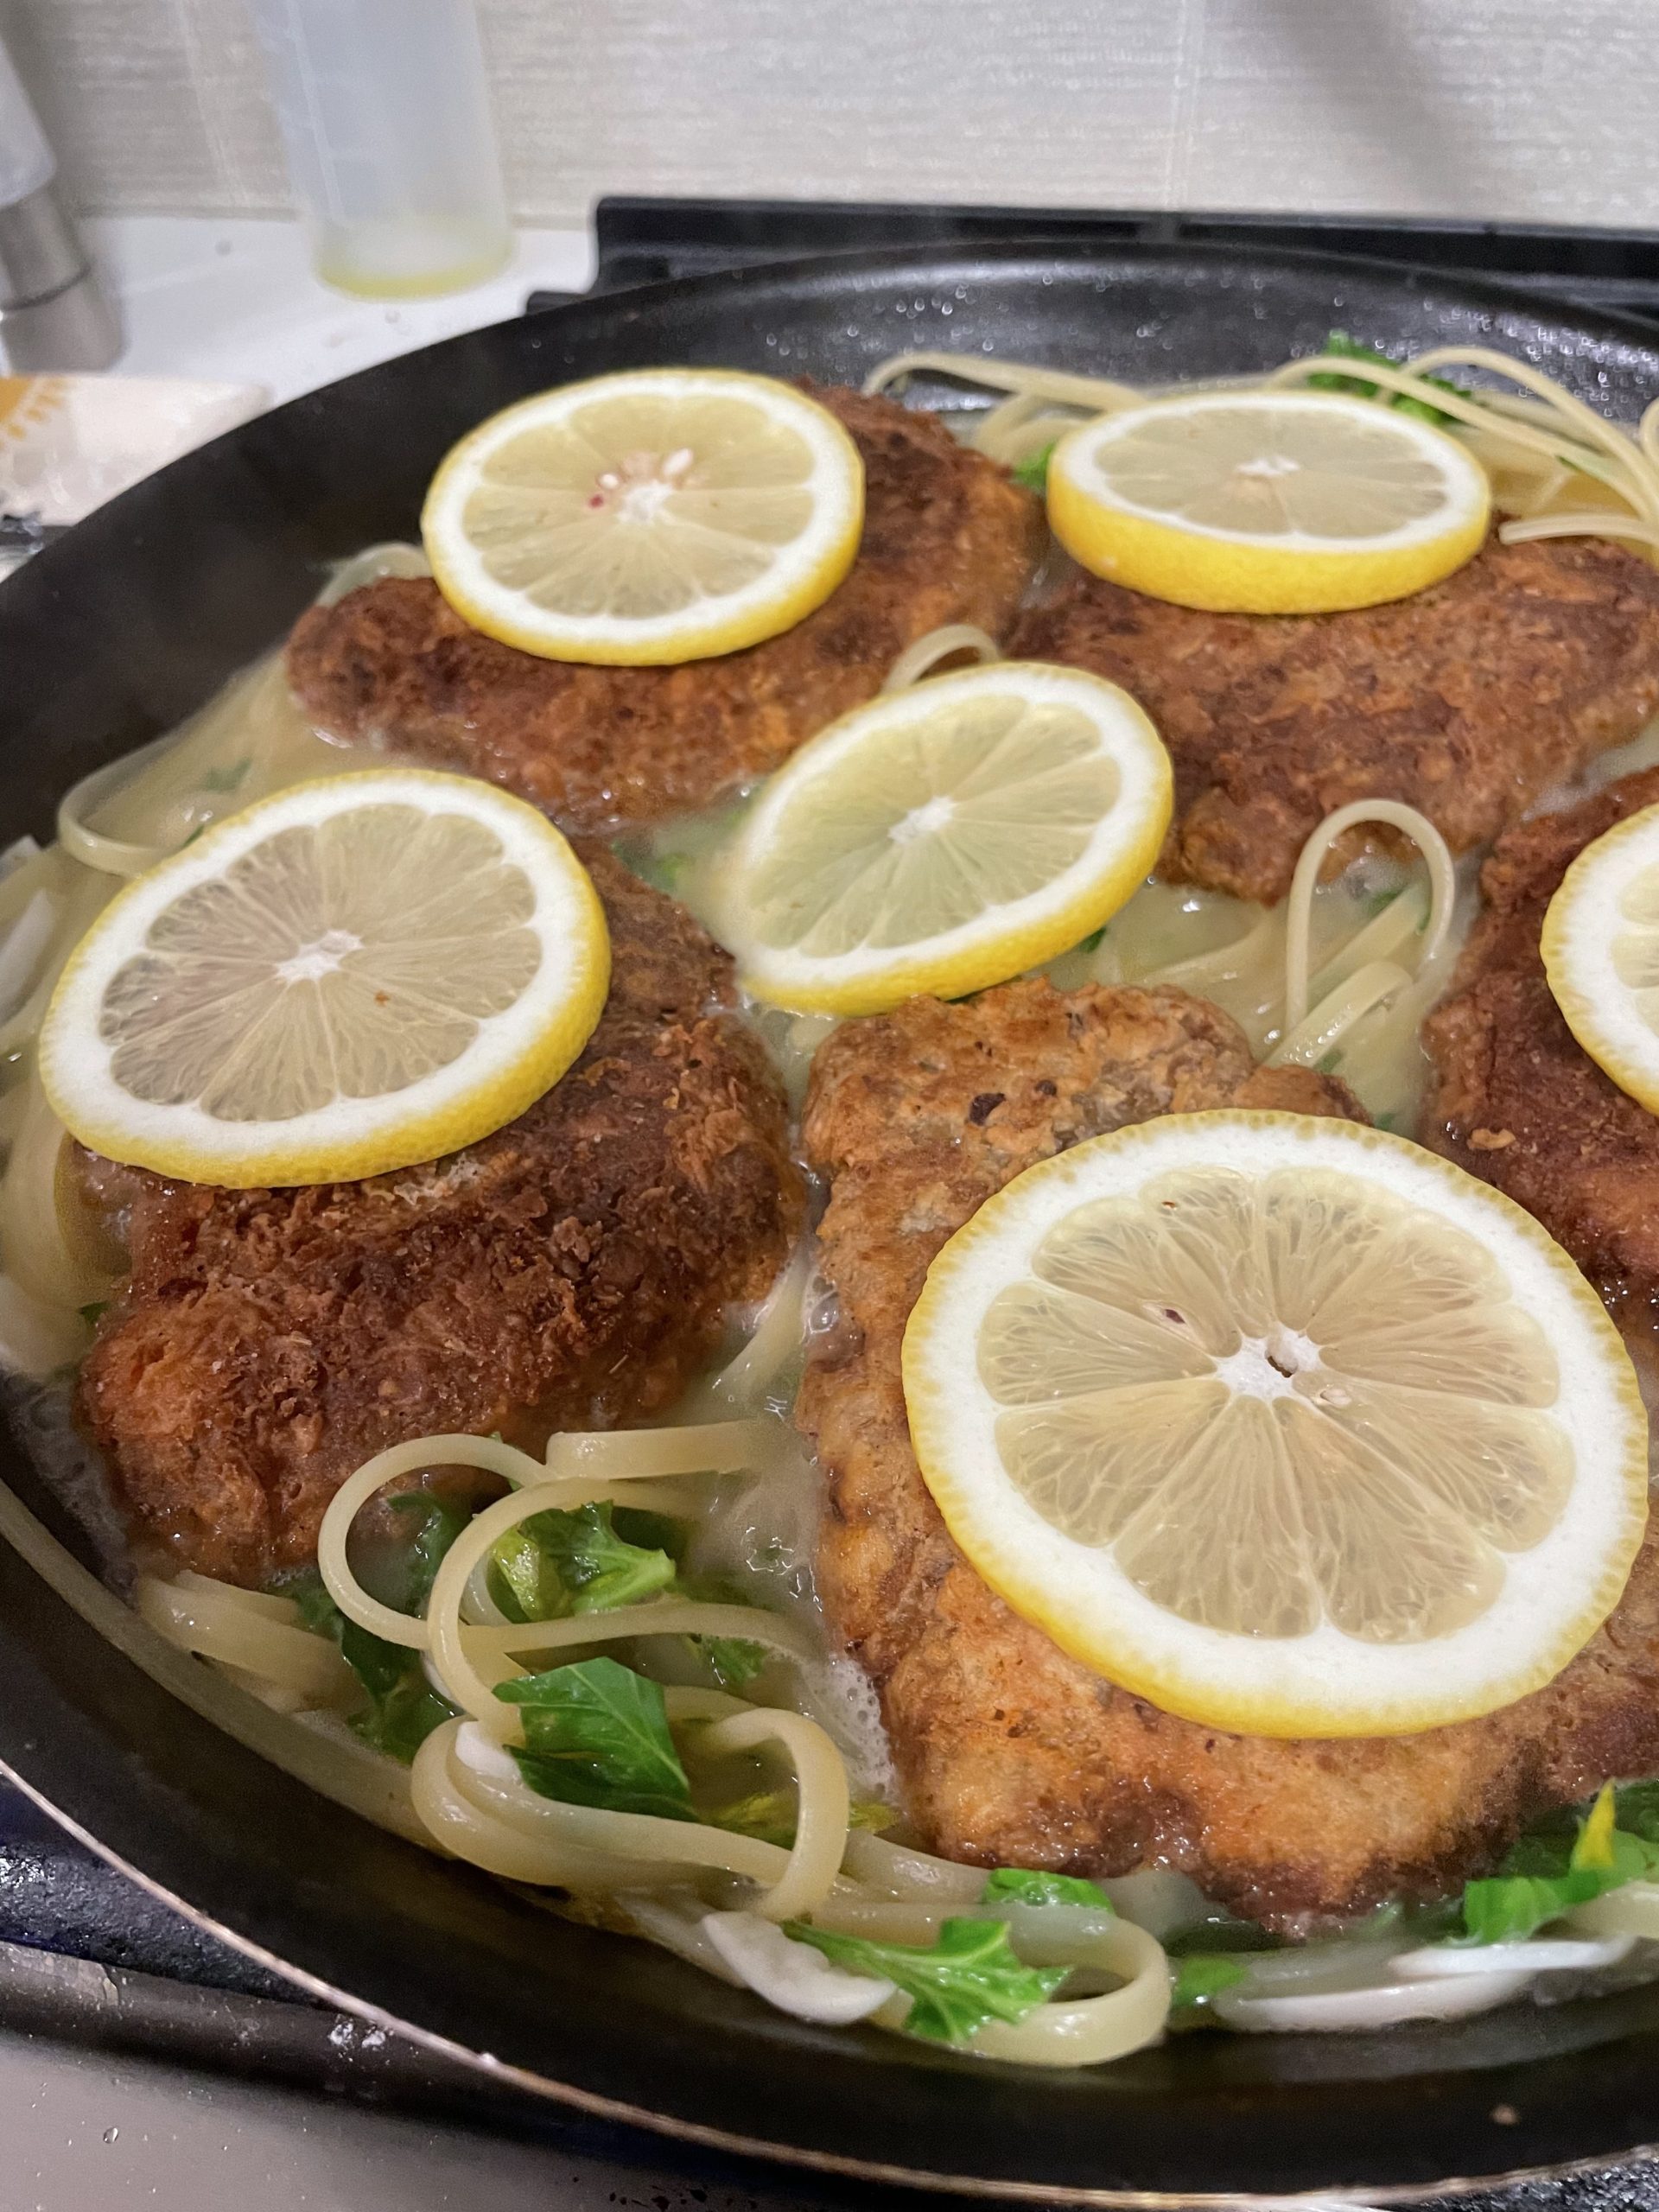
Vegan “Chicken” Francese with Linguine

Vegan “Chicken” Francese

This Chicken Francese is neither chicken (because it's vegan) nor French (because Chicken Francese is a dish invested in an Italian restaurant in New York) but it is 100% delicious. The tart, lemony sauce and fried 'chicken' cutlets are the perfect balance of texture and flavor. Enjoy this dish that is none of the things it claims to be, but still perfect.
Prep Time30 minutes
Cook Time30 minutes
Course: Main Course
Cuisine: American, French, Italian, vegan
Keyword: vegan
Servings: 4

Ingredients

Vegan Fried "Chicken" Cutlets

  • 1 can chickpeas A 400g can yields appx 250g beans after the liquid has been drained.
  • 1 tbls olive oil
  • 1/3 cup vegetable broth (80ml)
  • 2 tbls soy sauce
  • 1/2 cup vital wheat gluten (60g)
  • 1/3 cup panko bread crumbs (30g) Any breadcrumbs you have on hand will work fine
  • 1 tsp poultry seasoning If you don't have any premade available, you can make your own with 2 teaspoons ground dried sage. 1 ½ teaspoons ground dried thyme, 1 teaspoon ground dried marjoram, ¾ teaspoon ground dried rosemary. ½ teaspoon black pepper, and a good pinch of nutmeg.
  • 1/2 tsp salt
  • 1/2 tsp pepper
  • 1 cup flour (120g)
  • 2 tbls panko bread crumbs Any breadcrumbs you have on hand will work fine
  • 1 tsp poultry seasoning
  • 1 tsp salt
  • 2 tbls plant based milk I used Ripple brand pea milk which is richer and creamier than most plant based options
  • 1/2 cup Just Egg If you don't have Just Egg available in your area, you can replace with more plant based milk
  • 2 cups vegetable oil

Lemon Sauce

  • 4 tbls plant based butter (60g)
  • 4-6 cloves garlic very finely sliced
  • 3/4 cup vegetable broth (180ml)
  • 3/4 cup dry white sherry (180ml) Or feel free to sub any dry white wine
  • 1/4 cup lemon juice (60ml)
  • 1/4 cup parsley (roughly 10g) finely chopped
  • 1 lemon sliced

Pasta, to serve

  • 8 oz linguine (225g)

Instructions

Make the fried "chicken" cutlets

  • Add the drained chickpeas to a bowl and mash them with a fork or potato masher until fully crushed. They will leave little "skins" which is fine, just make sure not to leave any full beans intact.
  • Add the olive oil, vegetable broth, soy sauce, wheat gluten, 1/3 cup breadcrumbs, poultry seasoning, and salt and pepper to the chickpeas. Stir to combine, then use your hands to kneed into a dough. This should take about 2-3 minutes and it will form a firm dough that holds together.
  • Divide the dough into 8 roughly equal balls and flatten and elongate until you have a flat patty a bit bigger than your palm. You're going for a chicken cutlet/flattened chicken breast replacement here, if that helps with shaping. They should be about 1/2 inch thick.
  • Set the cutlets aside and in one bowl, mix the flour, remaining panko breadcrumbs, poultry seasoning, and salt. In another bowl, mix together the Just Egg (if using) and plant based milk. Put the 2 cup of vegetable oil in a large fry pan on medium-high heat. You'll want to let it heat up for a few minutes – and will know its ready when the end of a wooden spoon or chopstick inserted in the oil creates small bubbles that float to the top. No bubbles, let the heat increase a bit. Loads of large and irregular bubbles, decrease the heat a bit.
  • Once the oil is hot, take your cutlets and dip them one by one, first in the flour mixture, patting down to fully coat; then in the Just Egg/plant milk mixture, again covering the entire surface on both sides; then once again in the flour mixture so the outside is dry. I find it helpful to use one hand for moving the cutlet from the flour to the wet mixture then back again, and the other hand for coating with flour/grabbing the next cutlet. Or you can just rinse you hands between coatings. Put the coated cutlet immediately in the hot oil, where it should begin to bubble and fry immediately. If it doesn't start bubbling, your oil isn't hot enough which will result in a soggy outcome and likely your 'chicken' will stick to the bottom of the pan. Let the pan heat up before adding the next one.
  • Cook the cutlets a few at a time, not crowding the pan, for 2-3 minutes per side or until a very dark golden brown. Remove from the oil and place on a drying rack with a cutting board or paper towel underneath to catch the oil for easier clean up. Once they have all cooked, set them aside while you prepare the lemon sauce and pasta.

Make the Lemon Sauce and Pasta

  • Put a large pot of salted water on high heat to come to a boil – this will be for your pasta.
  • While the pasta water is heating up, in a clean fry pan over medium heat, add your vegan butter. Once it's fully melted, add the sliced garlic and cook until they are aromatic and just starting to brown at the edges.
  • Add the vegetable stock, sherry or white wine, and lemon juice to the butter and garlic, and let reduce by half to two-thirds over medium heat, stirring occasionally so the garlic doesn't burn. This should take about 10 minutes.
  • While the sauce is cooking, and once the pasta water comes to a boil, add the linguine and cook until not-quite al dente (about 2-3 minutes less than the lowest end of the cooking time instructions on the package). Drain the pasta, and add to the sauce while it is still reducing. The pasta will finish cooking in the lemon sauce as it cooks down, and will help thicken the sauce slightly.
  • Add the parsley and sliced whole lemon to the pasta and sauce, and toss to ensure the parsley is fully distributed.
  • Finally add the fried "chicken" cutlets back on top of the pasta and sauce. Don't cover them in the sauce or flip them, or they will lose the crunch, fried texture, but you do want them to warm up and soak up a bit of the sauce from the bottom. Place remaining lemon slices on top of each cutlet.
  • Serve the dish with 1-2 cutlets, about 2oz of pasta per person, and a spoonful of the sauce from the pan on top. Enjoy!
Continue Reading

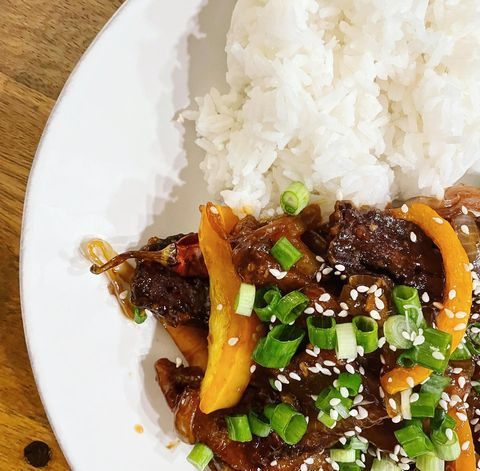
Vegan Szechuan “Beef” Stir Fry

Vegan Szechuan “Beef” Stir Fry

This stir fry has the perfect balance of great replacement beef texture, spicy and sweet sauce, and crunchy veggies. It definitely takes some effort but check the recipe notes for ways to simply the dish if you're just looking for a great Szechuan stir fry. If you are planning to make the "chickwheat" beef, note you'll need an Instant Pot or pressure cooker, a blender, and a pretty powerful food processor (or standing mixer with a dough hook).
Prep Time45 minutes
Cook Time2 hours 30 minutes
Course: Main Course
Cuisine: American, Chinese, vegan
Keyword: vegan
Servings: 4

Equipment

  • Instant Pot or pressure cooker
  • Food processor

Ingredients

Chickwheat Loaf, Modified from Avocados and Ales

  • 2 cups canned chickpeas (300g)
  • 1 cup aquafava (225ml) Aquafava is the liquid out of the can of chickpeas. You can sub vegetable stock instead.
  • 2 tbls vegetable oil
  • 2 tbls miso paste I used a yellow miso paste, but any light variation will do
  • 1 tsp salt
  • 1 tbls onion powder
  • 1 tbls garlic powder
  • 1 tbls poultry seasoning If you don't have any premade available, you can make your own with 2 teaspoons ground dried sage. 1 ½ teaspoons ground dried thyme, 1 teaspoon ground dried marjoram, ¾ teaspoon ground dried rosemary. ½ teaspoon black pepper, and a good pinch of nutmeg.
  • 1 tsp apple cider vinegar
  • 1 3/4 cup vital wheat gluten (255g)

Stir Fry Sauce

  • 3 tbls rice vinegar
  • 2 tbls rice wine If you don't have any available, you can use a dry white sherry, a white wine, or more rice vinegar
  • 1 tbls light soy sauce
  • 1 tbls dark soy sauce This is available in specialty Asian markets and has a much richer, saltier taste but if you can't find it, it's fine to replace with more of the light soy sauce
  • 1 tbls chili "crunch" oil This condiment is amazing and great on its own over vegetables, tofu, noodles… anything really! I like this Chili Crunch Oil
  • 1 tbls sriracha sauce
  • 1/2 cup mushroom or vegetable stock (120ml) The mushroom stock gives a meatier flavor but vegetable stock is fine
  • 3 tbls sugar
  • 1 tbls cornstarch
  • 2 tsp ground Szechuan peppercorns optional, but really makes a huge difference in giving that numbing, Szechuan flavor. Reduce to 1 tsp if you're worried about heat.

Stir Fry

  • 3 tbls Just Egg vegan egg substitute If Just Egg is available in your area, it definitely makes a difference in this dish. I haven't tried other vegan egg replacements so they may work as well – you want something quite rich and thick. I would not recommend trying a flax egg replacement as that will leave a grainy texture. If you don't have an egg replacement, you can just use 3 tbls plant based milk of your choice.
  • 1 tbls vegetable oil For the vegan beef marinate
  • 1/2 tsp salt
  • 1/3 cup cornstarch
  • 1/3 cup vegetable oil For frying – I use about 1-2 tbls at a time and see if I need more
  • 1/2 white or yellow onion Sliced into thin strips
  • 2 bell peppers Sliced into thin strips
  • 4 dried chili peppers Optional
  • 1 tbls garlic Minced
  • 1 tbls fresh ginger Grated on a microplane or chopped very fine
  • seasame seeds and sliced scallions For garnish

Instructions

Make the Chickwheat Loaf

  • Combine all of the ingredients in the chickwheat loaf except the vital wheat gluten and blend using a high speed blender until completely combined. It will be the consistency of a medium-thick batter.
  • Pour the mixture into a bowl, being sure to scrape out the inside of the blender cup, and add the vital wheat gluten. Stir to combine, then use your hands to kneed the dough for ~2 minutes to fully combine. Let sit for about 10-15 minutes for the gluten to absorb.
  • Take half of the chickwheat dough and put it in the bowl of your food processor and process for about 5-8 minutes. If you don't have a food processor, you can use the dough hook of a standing mixer but you won't get quite the same texture. You can't replace this with hand-kneeding – it won't get the same texture at all. While the dough is in the food processor or mixer, it will become very stretchy and stringy – you'll know it's almost ready when you see little 'strings' of the dough sticking to the sides of the food processor bowl. If your food processor is anything like mine, it will get quite hot, and because the dough gets so sticky, it will take a few minutes to scoop all of the dough out. Clear out your food processor, clean off the blade, then repeat with the second half of the dough (the only reason not to do them both together is it will be too much resistance and burn out most home food processors).
  • Once you've fully processed both halves of the chickwheat dough, kneed them back together and pat into a roughly rectangular shape. Wrap the square very tightly in tin foil – I recommend using 4 or 5 layers. This will create additional pressure and texture when you cook it in the next step.
  • Add two cups of water to your Instant Pot, or enough to cover the base but not reach the bottom of a trivet or stand. Place the foil-wrapped chickwheat dough on the trivet, then seal the Instant Pot.
  • Set the pressure cooker on manual and cook for 120 minutes.
  • Quick release the pressure, and remove the chickwheat loaf. The foil may have split as the loaf expanded – don't worry, it will still be fine. Let the loaf cool, then remove the foil. Once it's fully cooled to room temperature, you can use it immediately in the stir fry, or put it in the fridge for up to 3 days. It makes enough to use in other recipes as well, so be sure to save the leftovers and check out other meals using chickwheat.

Make the Stir Fry

  • In a large bowl, whisk together all of the ingredients of the stir fry sauce and set aside.
  • Now, in a separate bowl, whisk together the Just Egg (or vegan milk if substituting), 1 tbls vegetable oil and salt. Then take 1/2 of the chickwheat loaf, and slice into 1/4 inch thick strips. Cut these strips in half width-wise to make them about half the size of your palm. They can (and should) be fairly irregular. These are your 'beef' strips so feel free to slice as you prefer. Add the sliced chickwheat loaf to the Just Egg, oil, and salt mix and toss to coat. Then add the 1/3 cup cornstarch and toss again. Use a spoon or your hands to make sure every strip has a bit of coating – it will be uneven which is fine, that helps give more texture.
  • Heat some of the remaining oil (~2 tbls) in a fry pan, then add the coated chickwheat strips to the pan – try and avoid them touching if you can. You will likely have to cook in multiple batches. Cook for 2-3 minutes per side on medium heat. When they start to get a dark color, remove the strips and place on a plate or drying rack if you want to remove the excess oil.
  • Once the chickwheat strips are all cooked, wipe out the pan and add another 1-2 tbls of the oil and add the onions, bell peppers, and dried chili. Cook for ~5 minutes until they are just starting to soften and get some color.
  • Add the minced garlic and ginger and stir until fragrant, only a minute or two.
  • Take the bowl of stir fry sauce, and give it a whisk just to make sure the cornstarch is fully combined. Then pour it over the vegetables in the fry pan and let it cook until it has thickened slightly, and the vegetables are soft, another ~5-8 minutes.
  • Finally, add the chickwheat strips back into the pan and let them warm up and get coated in the sauce.
  • Serve the stir fry over jasmine rice and garnish with the sesame seeds and sliced scallions

Notes

Alternative to Chickwheat Loaf:
This meal was a huge hit in our house and really captured the textures and flavors of a take-out beef stir fry. However the making the chickwheat loaf for the perfect beef strip texture is definitely a heavy lift and requires a fair amount of specialized kitchen equipment. If you want a ‘close enough’ alternative to the chickwheat, you can get store-bought textured vegetable protein which you can use as a replacement. Use ~1 cup of the TVP and rehydrate by placing in a bowl with 1.5 cups of boiling water for ~10 minutes. Then simply drain the water you used to rehydrate the TPV and add into the recipe at the end where you would otherwise add in the cooked chickwheat strips. This makes the recipe much more managable for a weeknight or quick meal, especially if what you really want is the Szechuan sauce flavor.
 
This post may contain affiliate links, which means that I may receive a commission if you make a purchase using these links. 
Continue Reading

The Perfect Vegan “Lamb” Gyro

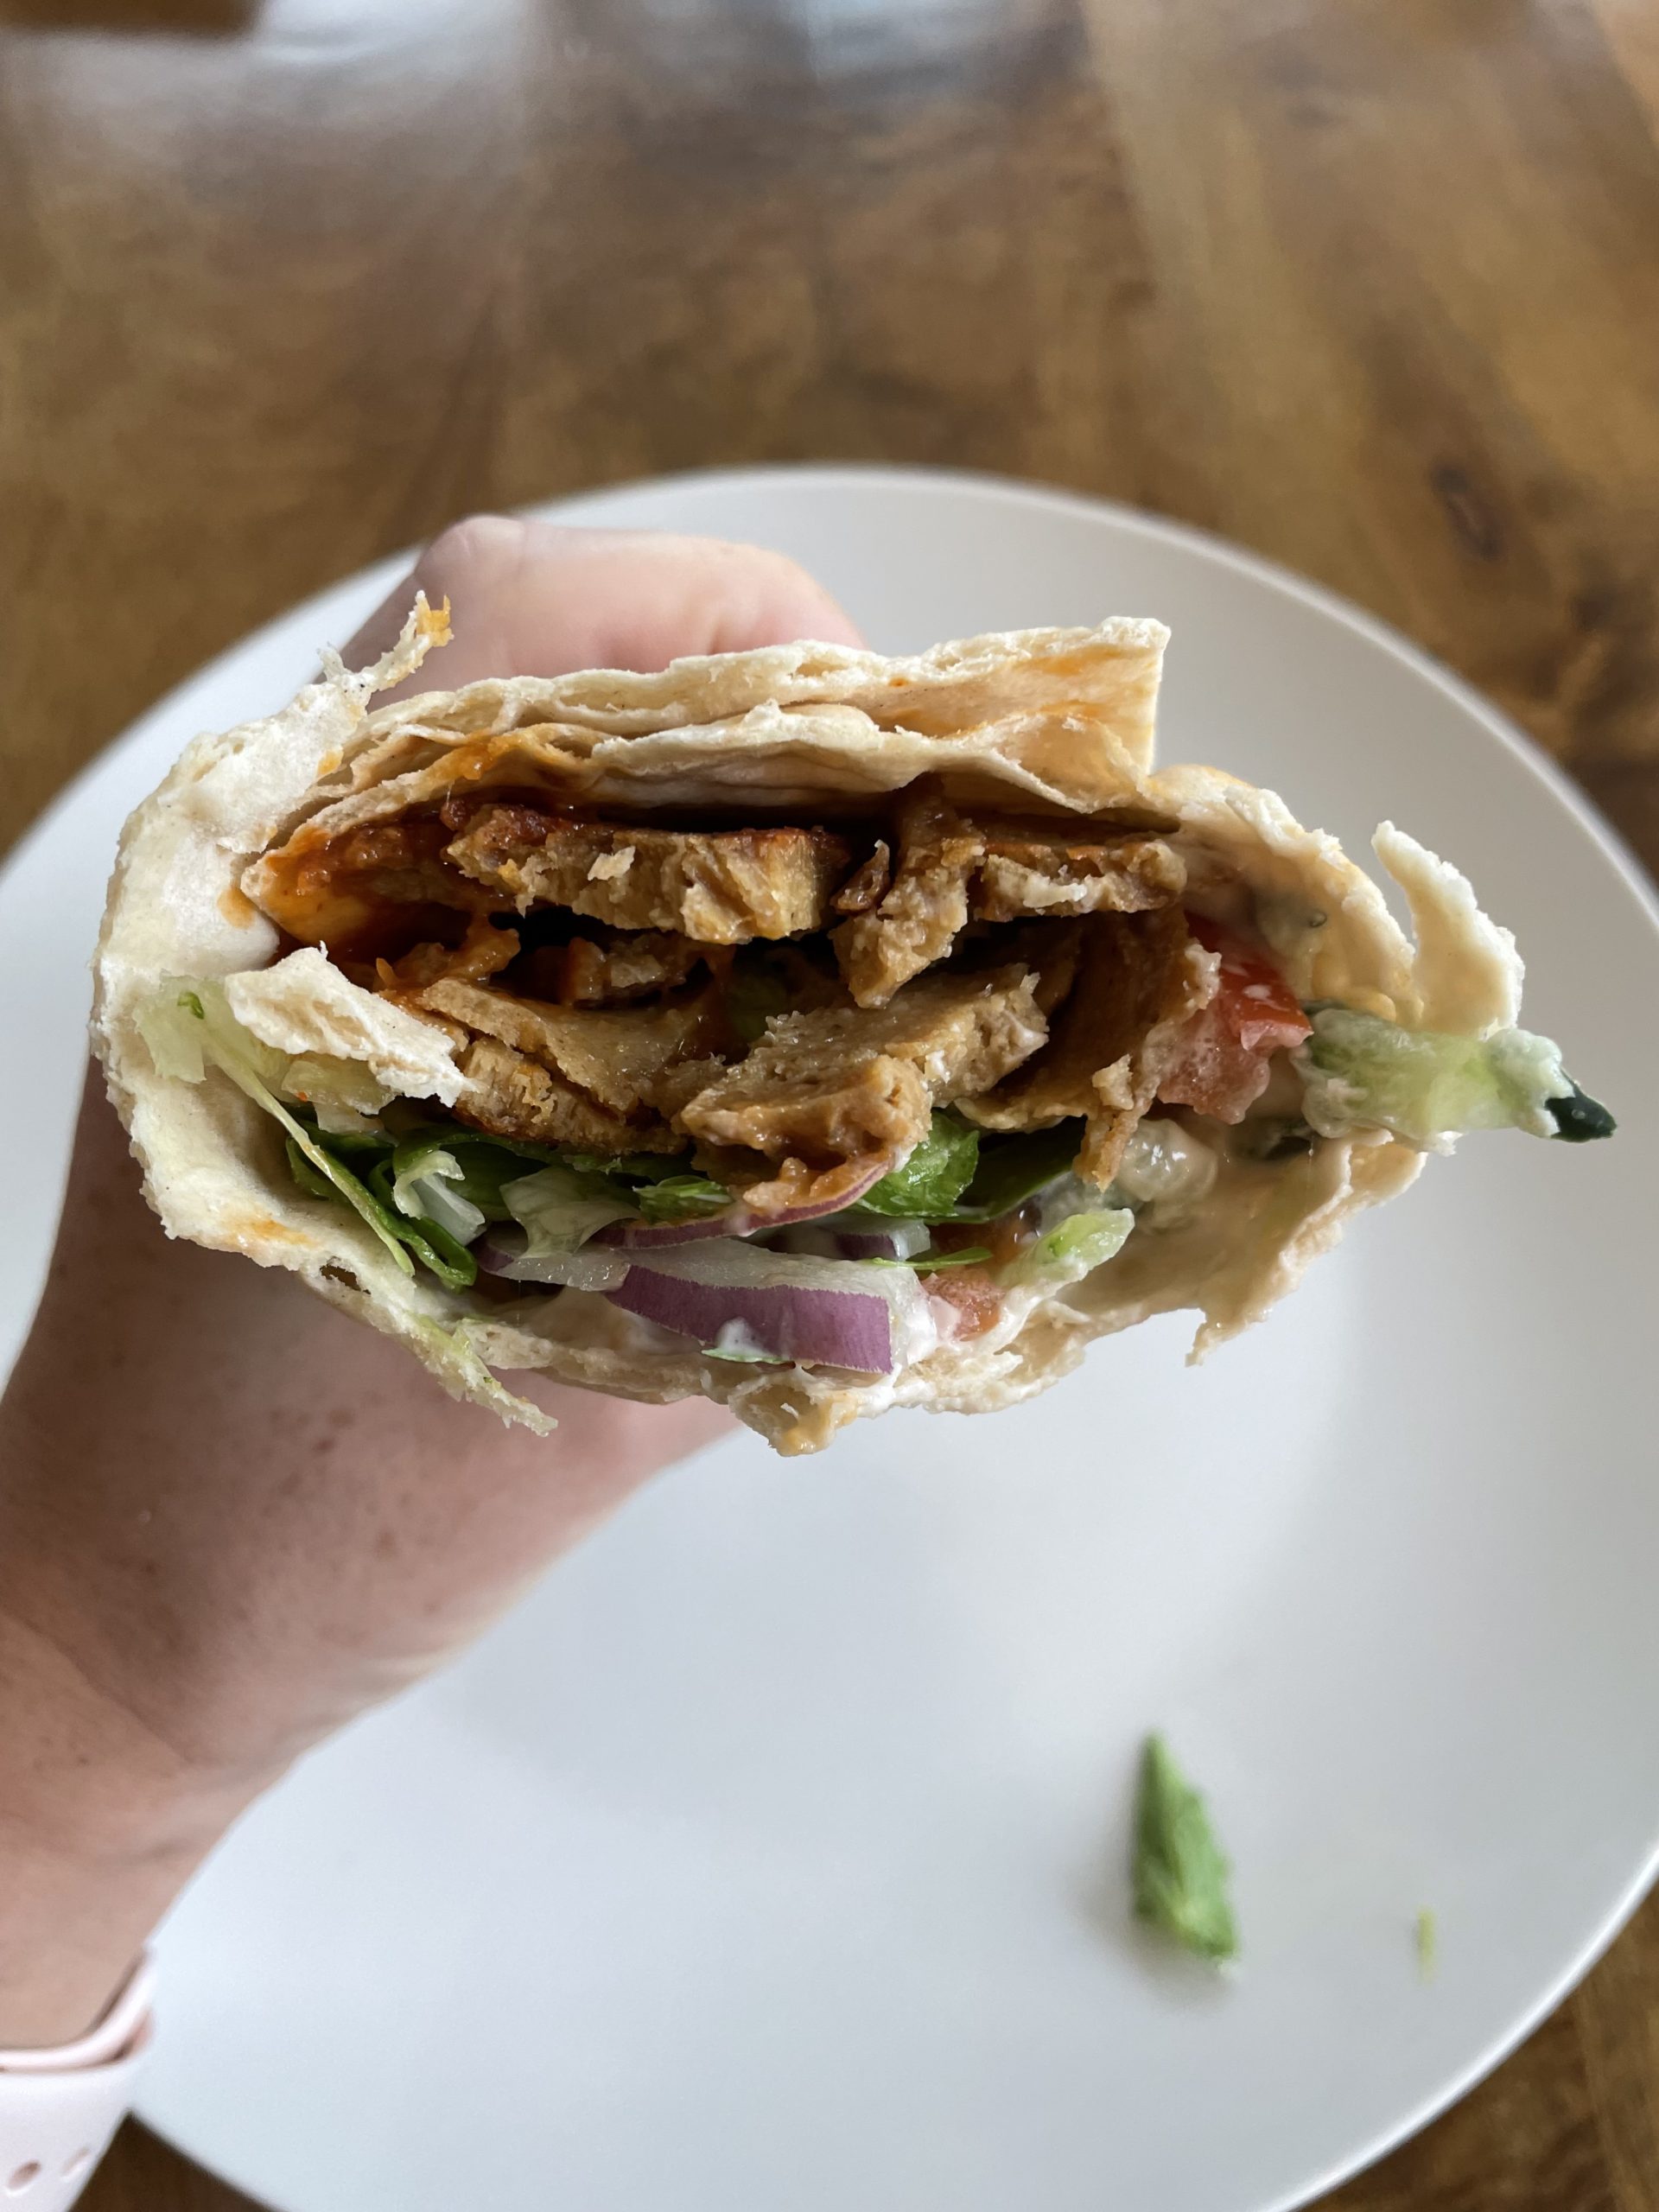
Vegan Gyros

These vegan gyros perfectly recreate the texture of the shaved lamb gyro wraps I loved when living in London. They definitely take some additional prep and planning work – although the chickwheat loaf here is the same one I use in vegan beef stirfry so you can make the chickwheat loaf and use it in multiple meals. If you are planning to make the "chickwheat" beef, note you'll need an Instant Pot or pressure cooker, a blender, and a pretty powerful food processor (or standing mixer with a dough hook). As an alternative, you can use a vegan sliced deli meat like the Tofurky brand although the texture won't be quite the same. Just use that in place of the chickwheat strips where referenced.
Prep Time45 minutes
Cook Time2 hours 30 minutes
Course: Main Course
Cuisine: American, Greek, vegan
Keyword: vegan
Servings: 2

Equipment

  • Instant Pot or pressure cooker
  • Food processor

Ingredients

Chickwheat Loaf, Modified from Avocados and Ales

  • 2 cup canned chickpeas (300g)
  • 1 cup aquafava (225ml) Aquafava is the liquid out of the can of chickpeas. You can sub vegetable stock instead.
  • 2 tbls vegetable oil
  • 2 tbls miso paste I used a yellow miso paste, but any light variation will do
  • 1 tsp salt
  • 1 tbls onion powder
  • 1 tbls garlic powder
  • 1 tbls poultry seasoning If you don't have any premade available, you can make your own with 2 teaspoons ground dried sage. 1 ½ teaspoons ground dried thyme, 1 teaspoon ground dried marjoram, ¾ teaspoon ground dried rosemary. ½ teaspoon black pepper, and a good pinch of nutmeg.
  • 1 tsp apple cider vinegar
  • 1 3/4 cup vital wheat gluten (255g)

Gyros

  • 3 tbls Just Egg vegan egg subsitute If Just Egg is not available, you can use plant based milk instead
  • 2 tbls vegetable oil divided, see instructions
  • 1 tsp salt
  • 2 tbls cornstarch
  • 1 cucumber
  • 1 cup vegan yogurt (150g) ideally look for a vegan Greek-style yogurt – I use the Kite Hill brand
  • 1/2 lemon
  • 1/2 red onion thinly sliced
  • 1 tomato
  • 1 head gem lettuce
  • 2 flatbread or pita wraps If you can't find a vegan flatbread, you can use a large tortilla instead
  • salt and pepper to taste
  • hot sauce optional (I've used both Cholula and Frank's Red Hot and both were delicious)

Instructions

Make the Chickwheat Loaf

  • Combine all of the ingredients in the chickwheat loaf except the vital wheat gluten and blend using a high speed blender until completely combined. It will be the consistency of a medium-thick batter.
  • Pour the mixture into a bowl, being sure to scrape out the inside of the blender cup, and add the vital wheat gluten. Stir to combine, then use your hands to kneed the dough for ~2 minutes to fully combine. Let sit for about 10-15 minutes for the gluten to absorb.
  • Take half of the chickwheat dough and put it in the bowl of your food processor and process for about 5-8 minutes. If you don't have a food processor, you can use the dough hook of a standing mixer but you won't get quite the same texture. You can't replace this with hand-kneeding – it won't get the same texture at all. While the dough is in the food processor or mixer, it will become very stretchy and stringy – you'll know it's almost ready when you see little 'strings' of the dough sticking to the sides of the food processor bowl. If your food processor is anything like mine, it will get quite hot, and because the dough gets so sticky, it will take a few minutes to scoop all of the dough out. Clear out your food processor, clean off the blade, then repeat with the second half of the dough (the only reason not to do them both together is it will be too much resistance and burn out most home food processors).
  • Once you've fully processed both halves of the chickwheat dough, kneed them back together and pat into a roughly rectangular shape. Wrap the square very tightly in tin foil – I recommend using 4 or 5 layers. This will create additional pressure and texture when you cook it in the next step.
  • Add two cups of water to your Instant Pot, or enough to cover the base but not reach the bottom of a trivet or stand. Place the foil-wrapped chickwheat dough on the trivet, then seal the Instant Pot.
  • Set the pressure cooker on manual and cook for 120 minutes.
  • Quick release the pressure, and remove the chickwheat loaf. The foil may have split as the loaf expanded – don't worry, it will still be fine. Let the loaf cool, then remove the foil. Once it's fully cooled to room temperature, you can use it immediately in the gyros, or put it in the fridge for up to 3 days. It makes enough to use in other recipes as well, so be sure to save the leftovers and check out other meals using chickwheat.

Make the Gyros

  • Whisk together the Just Egg (or vegan milk if substituting) ,1 tbls of the vegetable oil and salt. Then take 1/2 of the chickwheat loaf, and slice into 1/4 inch thick strips. These are your 'lamb' strips so feel free to slice as you prefer. Add the sliced chickwheat loaf to the Just Egg, oil, and salt mix and toss to coat. Then add the cornstarch and toss again to give the slices an uneven coating.
  • Heat the remaining oil (~1 tbls) in a fry pan, then add the coated chickwheat strips to the pan – try and avoid them touching if you can. You will likely have to cook in multiple batches. Cook for 3-4 minutes per side on medium heat. When they start to get a dark color, and a bit crispy on the outside, remove the strips and place on a plate or drying rack if you want to remove the excess oil.
  • Once the chickwheat strips are all cooked, make your vegan tzatziki for the sandwiches. Grate the cucumber on a cheese grater, then fold the grated cucumber in a kitchen or paper towel and squeeze firmly to remove all of the excess liquid. Then add the shredded and drained cucumber to the vegan yogurt along with the juice of 1/2 lemon and stir to combine. Add salt and pepper to taste and set aside.
  • Slice the red onion into very thin slices, and slice the tomato (it doesn't have to be nearly as thin). Chop the lettuce into small thin strips.
  • Finally, prepare the gyros by warming the flatbread, pita, or tortilla for a 20-30 seconds in the microwave so it's easier to fold up, then layering first a thick layer of the tzatziki, then the sliced tomato, onion, and lettuce, and finally layering a very generous amount of the cooked chickwheat slices. Top with hot sauce of your choice, then roll up the gyro like a burrito with one end open. Enjoy!
Continue Reading

Vegan ‘Scallop’ Mushrooms with Preserved Lemon Relish

Vegan ‘Scallop’ Mushrooms with Preserved Lemon Relish

A delicious replacement for a seafood classic. Oyster mushrooms make the perfect vegan 'scallop'.
Prep Time20 minutes
Cook Time10 minutes
Course: Appetizer, Main Course
Cuisine: Italian, Mediterranean
Keyword: vegan
Servings: 4

Ingredients

  • 2 lbs King Oyster Mushrooms
  • 3 tbls Vegan Butter I used a high melting point brand such as Miyokos
  • 1 Preserved Lemon These can be a bit tricky to find – I have ordered them online or occasionally found them at Sur la Table
  • 1 Shallot
  • 3 tbls Parsley, chopped
  • Linguine
  • 2-3 tbls Olive Oil
  • Salt and pepper To taste

Instructions

  • Make the preserved lemon relish. Remove the lemon peel and finely chop the remaining fruit. Finely dice the shallot, and finely chop the parsley. Mix the chopped lemon, shallot, and parsley with salt and pepper to taste and set aside.
  • Cut the king oyster mushroom stems into large, scallop-sized pieces. Discard the caps or save them for a stock or separate dish. Using a paring knife, score a hatch pattern on both flat sides of the mushroom pieces.
  • Place a large, salted pot of water on the stove to come to a boil. Place the vegan butter in a large sauté pan over a medium heat.
  • Once the vegan butter is fully melted, put the mushrooms slices in the pan and sprinkle with salt and pepper. Let cook for 3-4 minutes per side or until golden brown and the scored lines are well-defined. Spoon the melted vegan butter over the mushrooms to baste them while cooking. Once they are fully browned on both sides, remove the pan from the heat and set aside while you cook the pasta.
  • Prepare the linguine according to package instructions. Once cooked, remove and toss with the olive oil.
  • Serve the dish by plating the pasta, placing a quarter of the cooked scallop mushrooms on top, then garnishing generously with the preserved lemon relish.
Continue Reading

Cranberry Maple Scones

Cranberry Maple Scones [Vegan]

The cranberry obsession continues! Because HOLIDAYS I *had* to update my classic scone recipe to make a cranberry variation with a maple sugar glaze. The super tart fresh cranberries plus the sweetness of the glaze is a perfect combo. 
Prep Time10 minutes
Cook Time15 minutes
Total Time25 minutes
Servings: 6

Ingredients

Scones

  • 2 cups flour
  • 1/2 tsp salt
  • 1 tsp baking soda
  • 2 1/4 tsp cream of tarter
  • 2 tbs sugar
  • 3 tbs vegan butter, cubed and chilled I use Earth Balance or Miyokos
  • 2/3 cups almond milk
  • 2/3 cup fresh cranberries, halved
  • zest of one lemon

Glaze

  • 1/2 cup powdered sugar
  • 1 tbs maple syrup You can use up to 2 tbs if you want a more liquid, clear glaze with a more maple flavor.

Instructions

  • Preheat the oven to 425 degrees.
  • Mix the flour, salt, baking soda and cream of tarter in a mixing bowl and whisk to combine. Then, using your fingers, work the cubed butter through the flour mixture until it’s fully combined and you can’t feel any big lumps of butter remaining. 
  • Add the sugar and the lemon zest, and stir again to combine. Then add the almond milk and mix well to combine. Make sure the flour mixture is fully moistened. Then add the chopped cranberries and mix until they are evenly distributed throughout the dough. 
  • Turn out the dough onto a lightly floured surface. The dough is a bit sticky so you might want to flour your hands before working with it. Kneed it a few times to make sure it’s all combined then roll out the dough until it’s about 1 inch thick.
  • Slice thick wedges and place the scones on a baking tray lined with a silpat liner or wax paper. Bake for 12-15 minutes or until golden brown on top.
  • While the scones are baking, mix the maple syrup and powdered sugar to make the glaze. Stir it occasionally while you’re waiting to use it otherwise it will get too stiff. If this happens, just add a bit more maple syrup. 
  • When the scones are done, move them to a cooling rack for 5-7 minutes until they are cooled almost to room temperature but still slightly warm to the touch. Use a pastry brush to paint the glaze over the scones (or just spoon it on). Serve immediately.
Continue Reading

Vegan “The Next Best Thing to Real Bacon” Mushroom Bacon

Vegan “The Next Best Thing to Real Bacon” Mushroom Bacon [Vegan]

I made this for the first time as a topping for a roasted cauliflower soup and spent the rest of the meal annoyed that the soup was getting in the way of my fake bacon bits. I solved that problem by making a big batch of it to have on toast and it was heavenly. The secret is liquid smoke (and a lot of vegan butter…) along with the surprisingly meaty texture of oyster mushrooms. Enjoy this on toast, soups, in sandwiches, in a tofu scramble, on pizza… yeah, pretty much anywhere.
Prep Time5 minutes
Cook Time10 minutes
Total Time15 minutes
Servings: 2

Ingredients

  • 1 punnet oyster mushrooms (or about 2-3 oz)
  • 1 tbs maple syrup
  • 1/2 tsp soy sauce
  • 1/4 tsp liquid smoke
  • salt and pepper
  • 2 tbs vegan butter I use Earth Balance or Miyokos

Instructions

  • Mix the maple syrup, soy sauce, salt and pepper, and liquid smoke in a small bowl, whisk well and set aside.
  • Slice the mushrooms thinly. I pulled off the “leaves” and then sliced up the stem. Pour the liquid over the sliced mushrooms and stir to make sure all mushrooms are covered.
  • While they are soaking, heat up the margarine in a fry pan and when it’s just starting to bubble add the mushrooms and let them get a deep brown color, about 4-5 min per side.
  • Enjoy on toast, in a tofu scramble, in a sandwich, in soup… pretty much anywhere! 
Continue Reading